PLC Programming HandbooksPopular ArticlesNavigationUser login |
Image reflection with PhotoImpact 7I love those image effects that make it look like the object is sitting on a piece of glass. These instructions are mainly for my benefit to remember how to duplicate this effect. So here's the makeover of our Allen Bradley SLC500...
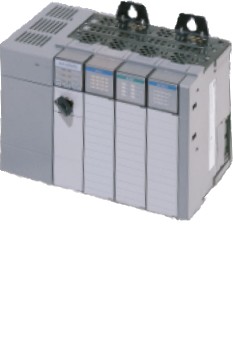
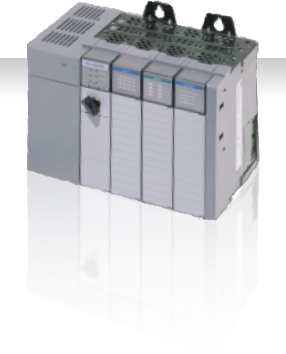
These instructios are based on the program PhotoImpact version 7. There's newer version that may do this automatically but I've been too cheap to buy an upgrade. I really should do it but here we are so lets do it in six easy steps. Step 1Make an object of each side. Use the selection tool and then the transform tool to resize it to a close match. You can change the transform on the icon bar to resize, slant or distort. Very useful. Once your done with the selection the right click on it and "convert to object". Step 2Flip the objects. Pull down the Edit menu and under "Rotate & Flip" select "Flip Vertically". Step 3Transform again. Now we need to transform the image to look like a reflection. Use the slant and grab an edge and pull it down to line up with the bottom of the upright image. You might need to use the perspective transformation as well depending on the angle of the original image. Step 4Merge and select. Now we need to get set up to make it look like a faded reflection. Select all the objects together, move them away from the original object and then merge them into the base image. Now select that inverted image (use the box select and then subtract from that with the magic select). You'll end up with something like this... 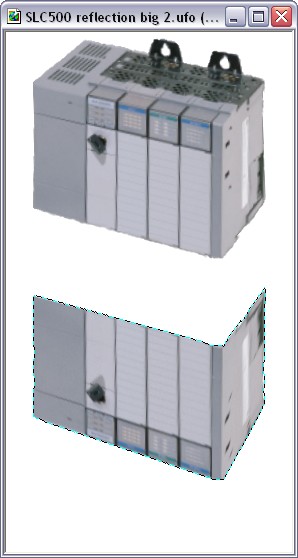 Step 5Fade away. Now here's the trick. With the inverted image selected pull down the Edit menu and chose "Fadeout...". 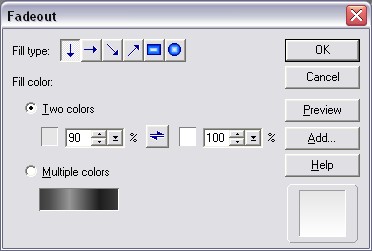 After you click "OK" hit the "Delete" key and bango you'll see the image fade. Now I like to start with a 90%-100% mix first and then I do it again with something like 50%-100% to really fade out the bottom part. Play around with the settings for your desired effect. Step 6Rejoice that you are now so cool. For the last trick make the whole image into an object, then create a box with a gradient and move it behind your image. Do a little touch up with the blur tool around the edges. ( categories: )
|
Welcome to PLCDevI'm the dude behind PLCDev and this is my blog to record my musings, technical notes, general doings behind the scenes, and anything that tickles my funny bone.
|

Thank you!
I have done manual fadeouts this whole time, but decided to search it out this time. Thanks for showing me what was always there, but I missed anyway.